

For adults with gradual shoulder pain who have been cleared for exercise. Pick one daily task, such as reaching a shelf, to track as you build strength. After surgery, a major tear, repeated dislocations or marked stiffness, follow an individual plan.
When to get help
- Emergency care for shoulder pain with chest pain or shortness of breath.
- Urgent assessment for a hot, red or swollen shoulder with fever or feeling very unwell, deformity after injury, sudden major weakness or loss of sensation.
- Prompt assessment if you cannot raise your arm after injury or numbness or weakness is worsening.
When to move up
Practice strength exercises on 2–3 nonconsecutive days a week. After 2–3 comfortable sessions with good control, usual sleep and no worse pain or function the next morning, increase either reach, repetitions or weight. If symptoms linger, return to the easier version. Stop for sharp or catching pain, numbness or sudden weakness.
1. Start with support
Warm up with 5–10 minutes of easy movement.
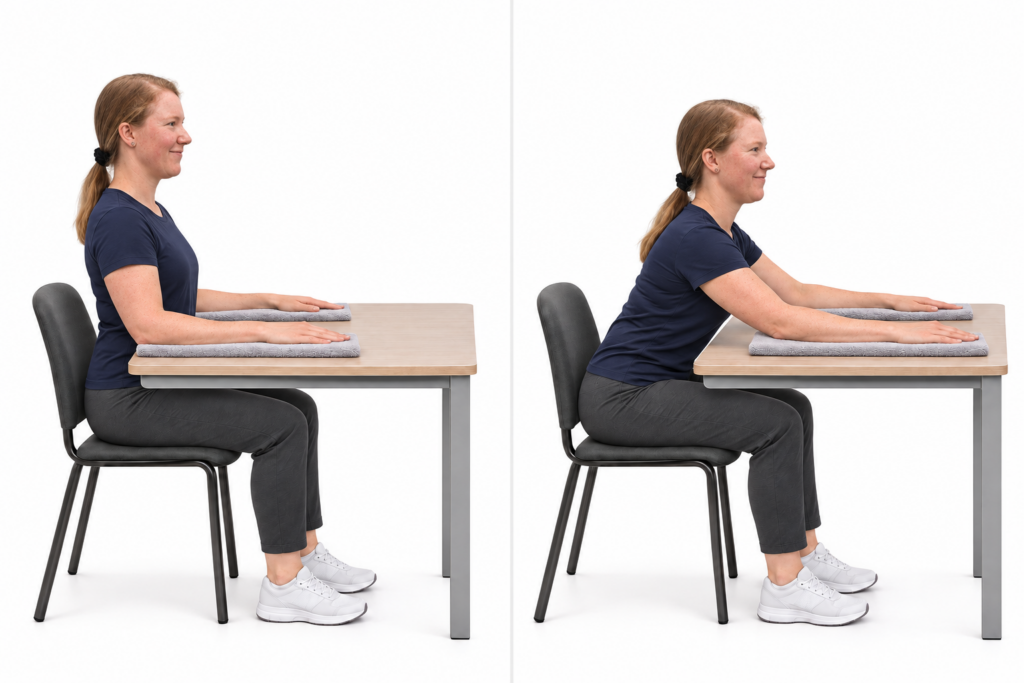
Table slide. Sit with your forearms on a towel. Lean forward and slide to a comfortable reach. Try 5–10 slides daily.
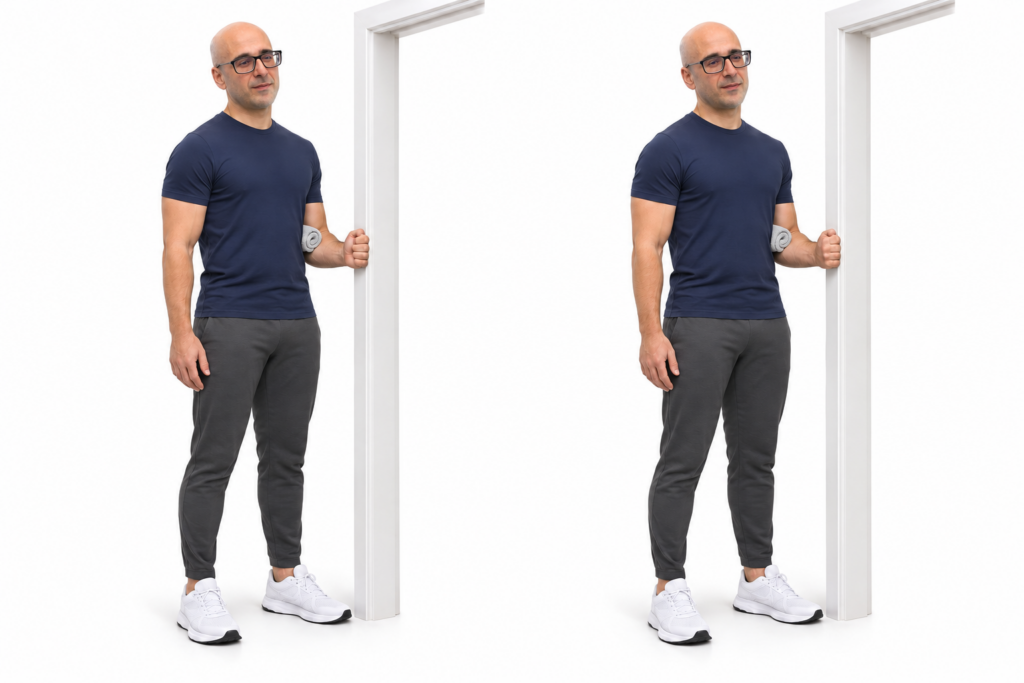
External-rotation hold. Bend your elbow beside your ribs. Gently press the back of your hand outward against a doorframe. Start with five 10-second holds, resting between them.
2. Build control upright
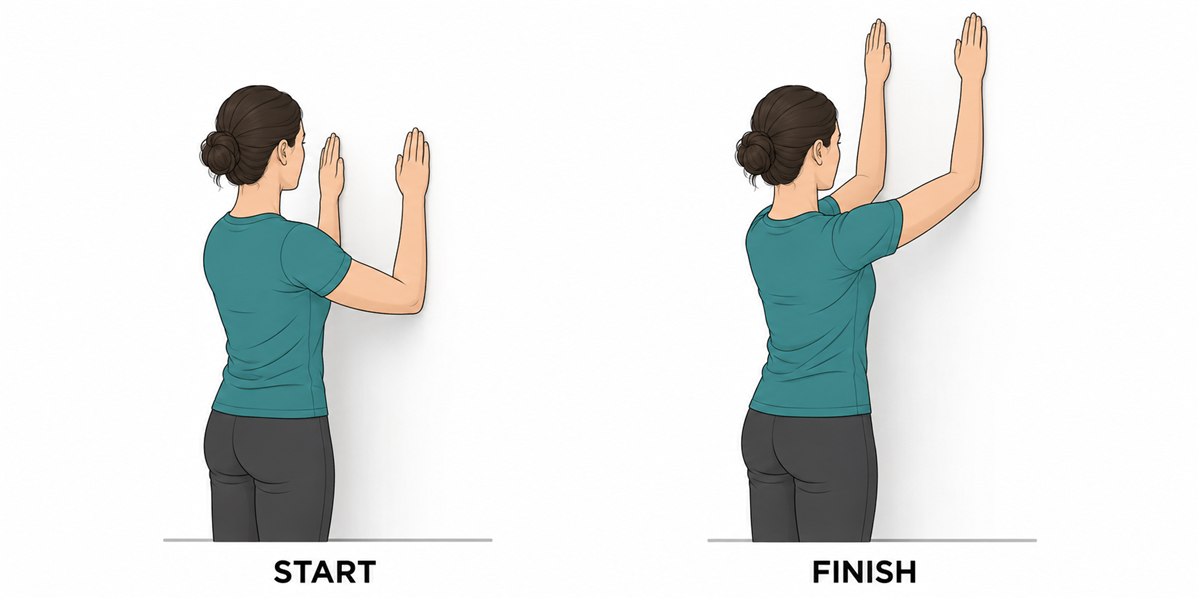
Forearm wall slide. When table slides feel comfortable, rest both forearms on a wall. Slide them up, letting your shoulder blades move around your ribs. Keep your back still. See the wall slide.
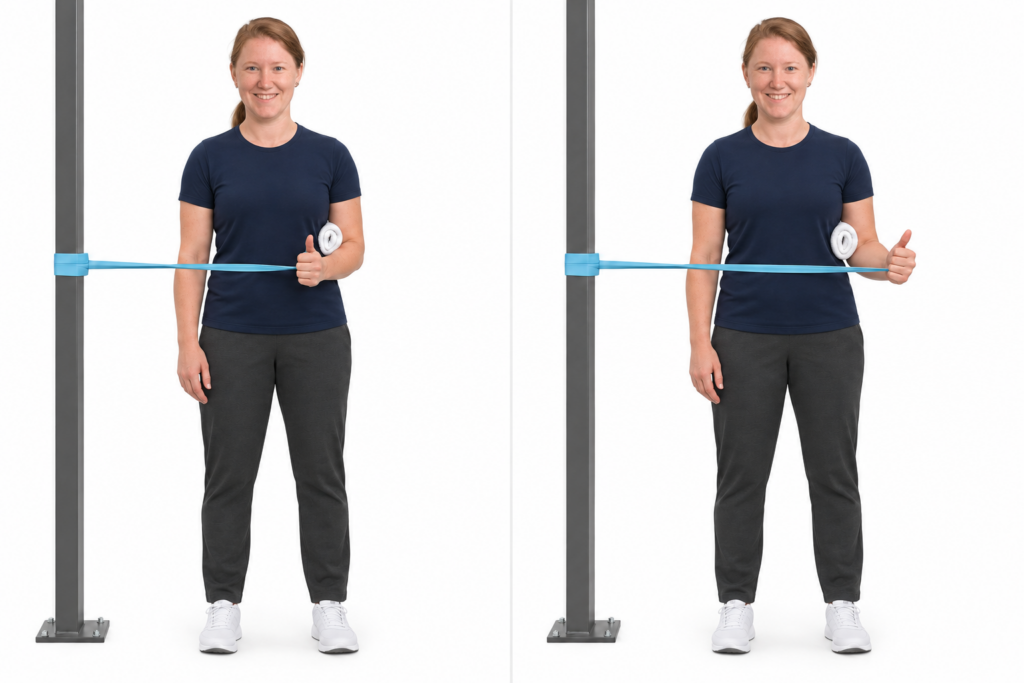
Band external rotation. Secure a light band at elbow height on the side opposite your working arm. Keep your bent elbow at your side as you turn your forearm outward. Lower slowly. Start with 8–12 reps.
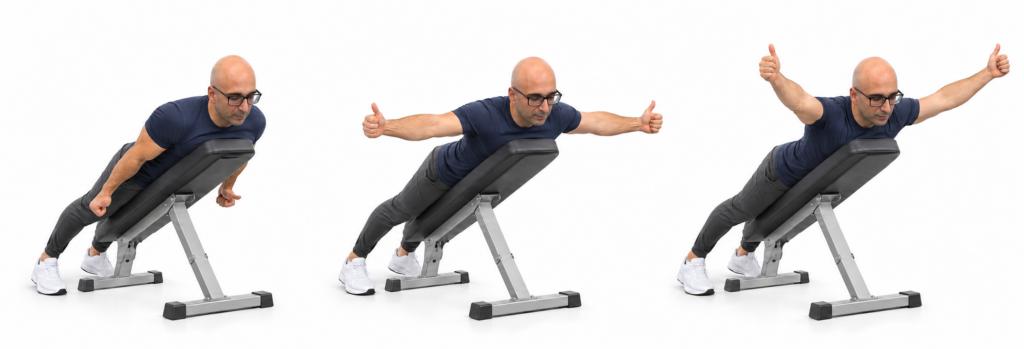
Optional low I. Rest your chest on a stable incline. With arms by your sides, reach toward your hips and lift your hands slightly.
3. Move to the mat
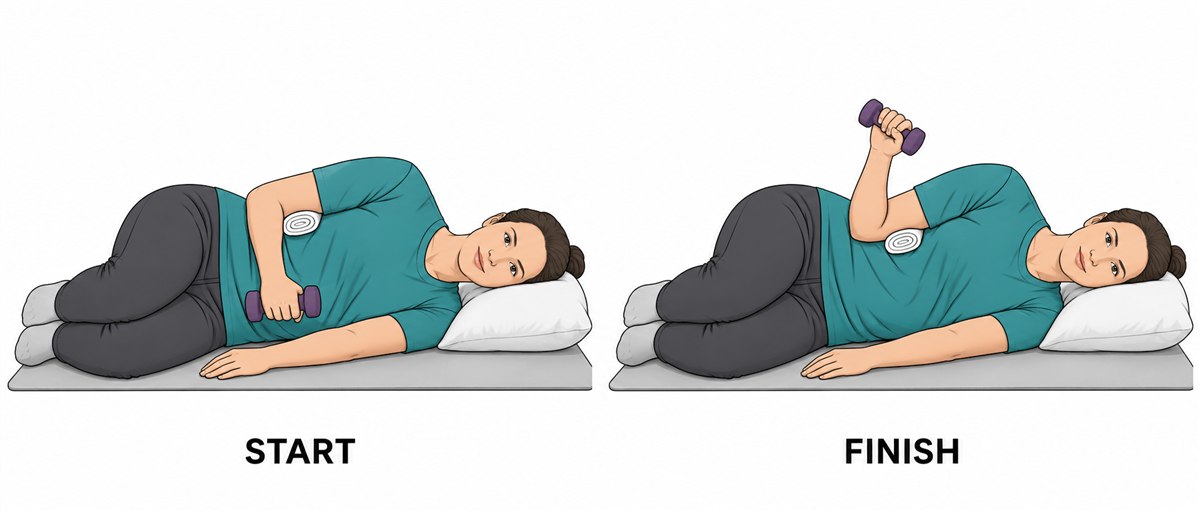
Side-lying external rotation. When getting on and off the mat is comfortable, lie with the working shoulder on top. Tuck a towel under your bent elbow. Turn your forearm upward without rolling back, then lower slowly. Start empty-handed and add a light dumbbell when ready. Watch the movement.
Face-down raises. Rest your forehead on a folded towel. For the low I, reach your arms toward your hips. Next, reach out to the sides in a T, thumbs up. Add a diagonal Y when overhead reach feels comfortable. Lift just clear of the mat. Try 5–8 reps in each comfortable position.
4. Add strength for your goal
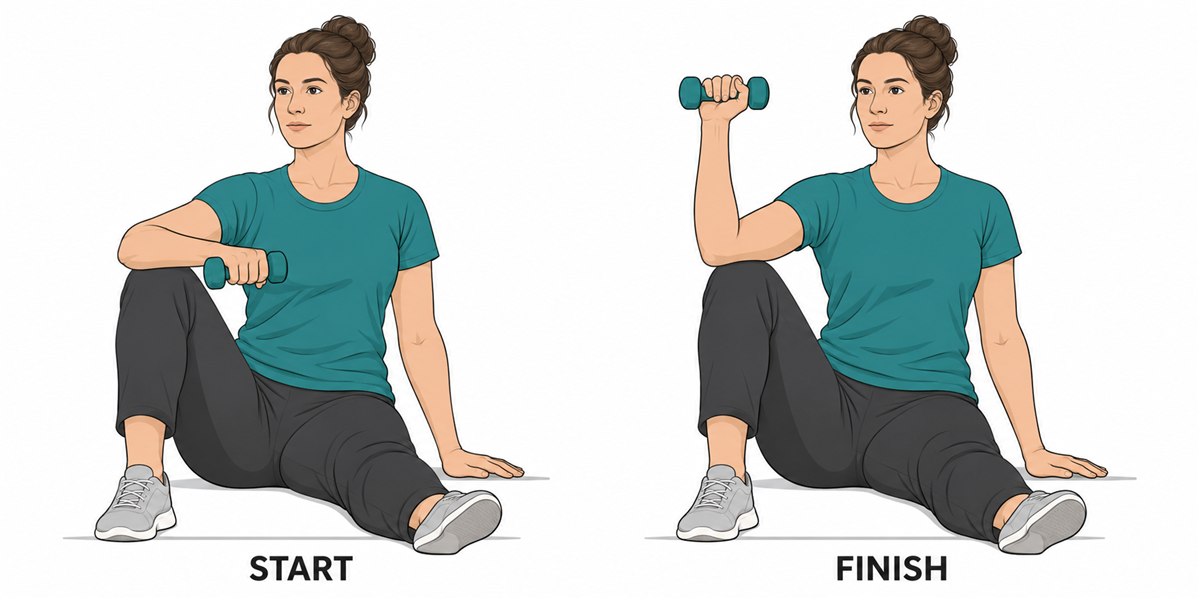
Soldier external rotation. Sit with one knee raised and the same-side elbow resting on it. Keep the elbow bent at 90°. Rotate your hand upward, then lower slowly without leaning back. Practice empty-handed before adding a light dumbbell. Watch the knee-supported rotation.
Wall push-up plus for pushing strength. Do a shallow wall push-up. At the top, keep your elbows straight and gently push the wall away so your shoulder blades glide forward. See the push-up plus.
Recheck your daily task. Seek review if pain, sleep or function worsens, or if you see no clear improvement after 4–6 weeks.
Exercise illustrations include AI depictions of Dr. Tro and Dr. Laura.
Get your free shoulder-pain worksheet
Illustrated exercises, starting doses, progression guidance and a fillable practice log.
Evidence and guidance
Rotator cuff clinical guideline · GRASP trial · AAOS exercise guide · BESS assessment guidance · Shoulder referral criteria